Progress on the workbench continues slowly but surely. Below you can see Lex posing with the last of the 3 main laminations that will makeup the benchtop.
Below you can see there is a fair bit of glue squeeze-out to clean up and the edges are slightly out of alignment.
I used an old jack plane with a cambered iron to scrub the surface to even the edges of all the boards and remove the cured glue residue.
Below you can see all 3 sections after rough flattening of the top and bottom faces. Notice that there are some significant gaps between the edges of each section.
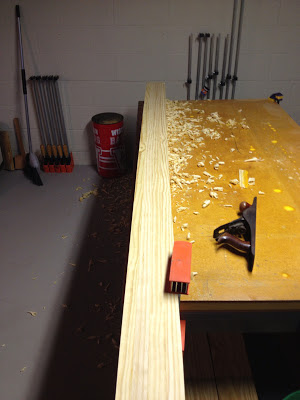
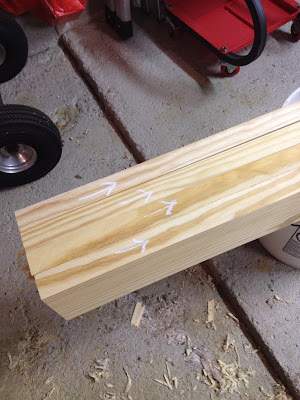
I flipped each section on its edge to true up the faces that would be glued together. Since these sections are quite big and awkward I decided to attempt to accomplish this with hand planes rather than try to wrestle them over my smallish 6" jointer. Step one was to identify any twist in the section and plane down the high spots. Below you can see that I used 2 pieces of angle aluminum as a set of winding sticks.
The goal is to set the two sticks at opposite ends of the board and then sight across them to figure out if they are parallel to each other or if one corner is high relative to the other. If you click on the image below and look carefully you should be able to see that in this case the right side of the rear stick is a bit more visible than the left indicating that the front left corner is high relative to opposite end.
I then moved the front winding stick forward about a foot and checked again. I repeated this and marked the high side at each location with an "X". If any of the locations that I checked were in perfect alignment with the rear winding stick I marked that location with an "O".
I then used the jack plane to plane down the high areas. I had to rinse and repeat a few times before the winding sticks showed that all of the twist had been removed but this was actually a fairly simple process.
Once the twist had been removed I had to address the bow along the length. In this case both ends of the section were high and the center section was low. This was pretty easy to correct with the jointer plane. The long sole of the plane allows the blade to cut a shaving over the high spots but keeps the blade up above the valley when riding over the low spots....Basically you just have to keep taking strokes from end to end until the plane takes a full shaving the whole length of the board. It was very cool how simple and effective this was.
After jointing one edge of each section by hand I ran them through the surface planer with the flattened face down to bring the other face parallel and to an even thickness. I also rotated the sections and ran them through the planer on edge to ensure the top to bottom thickness was even between all 3 pieces.
I then test fit the sections together. There was a small of bow that left a gap between two of the sections but they came together easily with a single clamp. Good enough.
I glued all 3 sections into one large slab following the same basic process that was used to create each laminated section.
Lineup the sections, add some glue, and a boatload of clamps.
Due to the sheer mass and rigidity of the sections it was difficult to get the top surfaces of each section to line up perfectly during the glueup. In a few areas the sections are misaligned by as much as 1/16" to 3/32". The benchtop is still a fair bit thicker than needed at this point so it won't be a problem to plane them all flush.
Similar to the individual sections I attacked the surface with the jack plane. Since there is quite a bit of material to remove I set the blade very aggressive and started hogging it off cross grain. I was surprised how quickly this went, at this point the plane is carving out chips rather than taking shavings. Awesome.
15 minutes or so later this section of the benchtop was crudely evened out. The surface left by the aggressive planing was very interesting and I'm tempted to make a table or something in the future and leave the top surface rough planed like this.
With the major discontinuities knocked down it was time to repeat the process of using the winding sticks to identify any twist in the assembly. The only major deviation from the process described above is that I found it very important to first ensure that the benchtop was concave from side to side. I used one of the winding sticks to check for light in the center and identify any humps in the middle. Any humps were knocked down with the jack plane. This way the winding sticks will sit solidly along the edges and not rock back and forth while trying to sight across them.
Here you can see another view of the winding sticks at the front and rear of the assembly.
Below is another example of how the winding sticks show twist. In this case the front right corner is high relative to the rear. As I was working on this step Lex stopped down in the basement to see what I was up to. I showed her the winding sticks and explained the concept. After showing her a few examples I started asking her to tell me where the high spots were. She either got it or was lucky because 9 times out of 10 I agreed with her. I'm not sure which one of us was more proud.
Lex and I continued down the benchtop and marked all the high spots and I removed them with the jack plane as before.
I worked the benchtop until all of the twist was gone. Since this is only a portion of the final benchtop so I decided not to spend any more time getting this section perfectly flat. There was a bit of bow along the length and a slight cupping across the width. The top was essentially dished in the middle. This is actually ideal since it is easy to flatten a dished surface later on.
At this point the assembly is 14 and 1/2" wide and since my thickness planer maxes out at 15" it is time to run it through one last time. This will bring the bottom of the benchtop parallel with the top and roughly flat. As I add the additional layers on each side I will then be able to use this center section as a reference to bring them flat and flush with the hand planes. Kudos to the Laura for helping to haul this 7 foot long, 14+" wide and 4" thick monster out of the basement and into the garage AND helping to feed it through the planer. She claims that this was my valentine's present this year... woodworking with the wife... I'll take it :)
After a few passes through the planer this center section of the benchtop is sitting at 4 and 3/8" thick. After final flattening I'm guess it will finish out just a bit fatter than my 4" target.
The next step is to add one more layer to the center section of the benchtop to get a bit closer to the desired bench depth followed by the more complicated layers that will include voids to create the leg mortises. That will complete the basic benchtop and allow me to shift focus to building up the legs.
According to my notes and fuzzy memory I have roughly 19 hours into this project to date.


