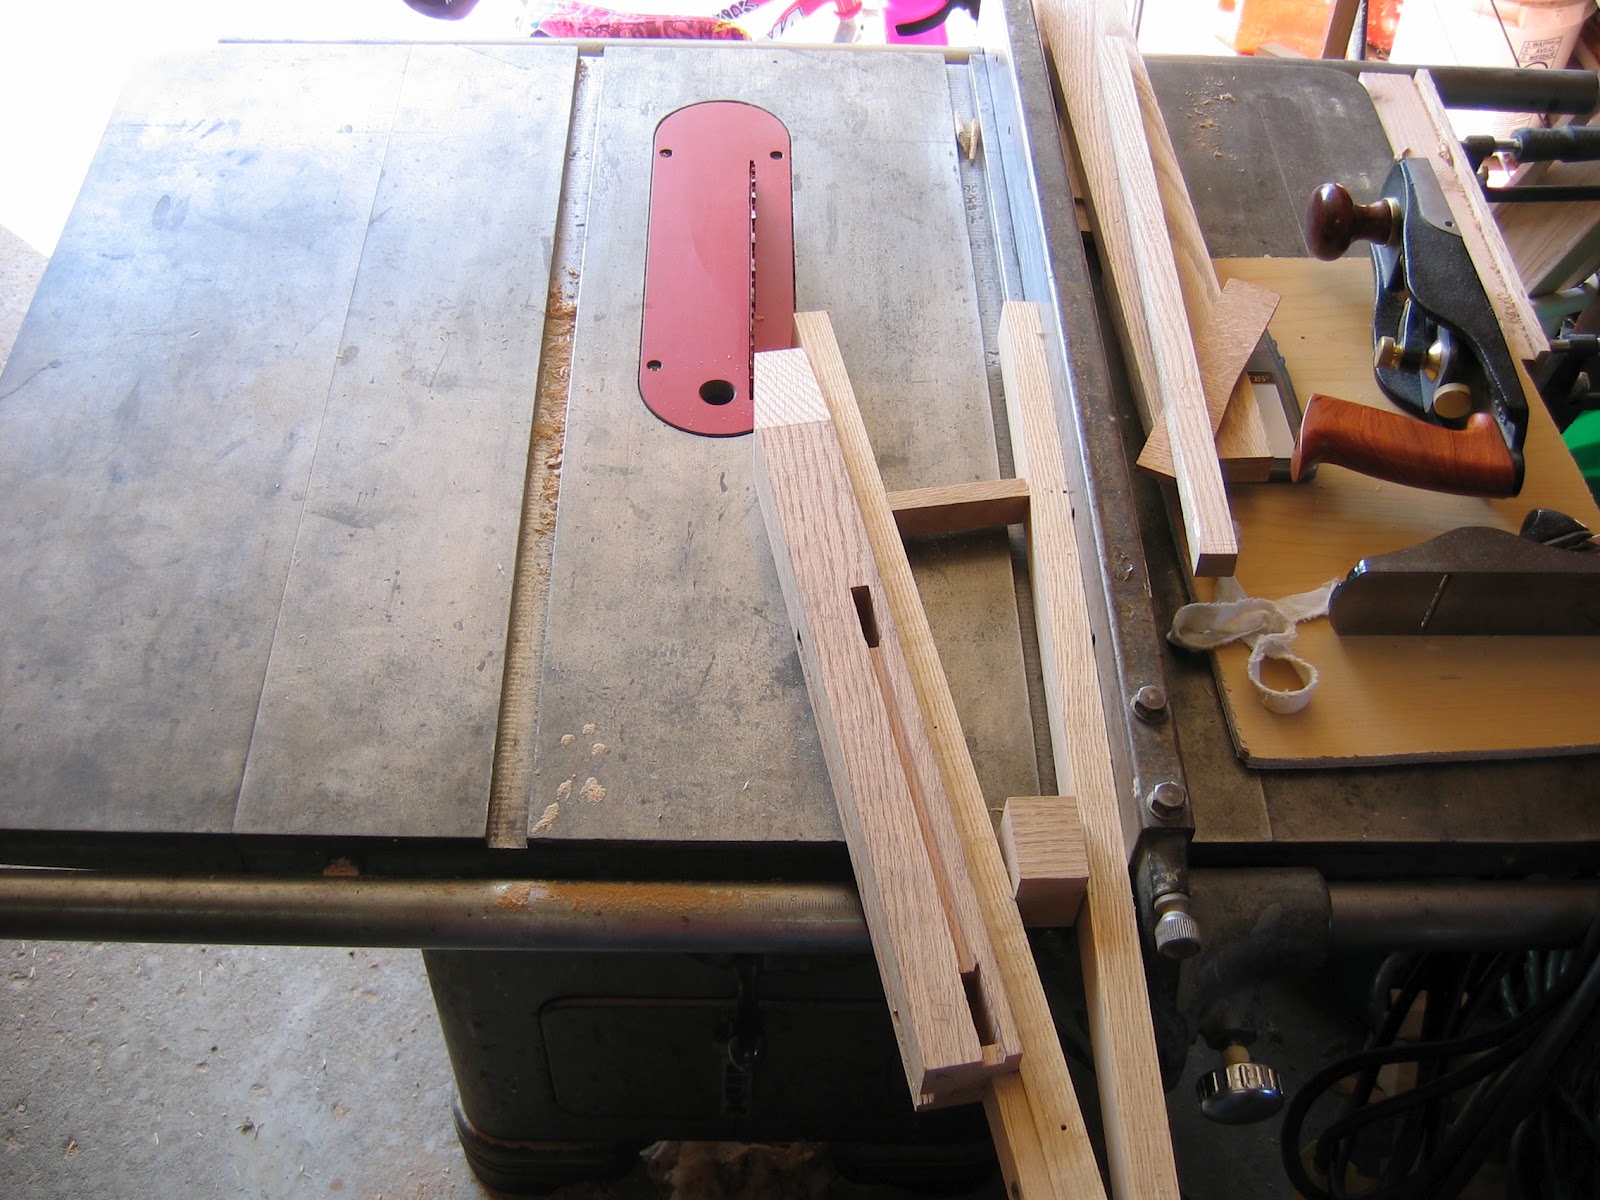
The next step in the entry bench project was to make all of the pieces that would create the ship-lap bottom. After planing all the pieces down to the proper thickness, jointing an edge, ripping them to width, and cross cutting them to length I got a chance to try out my new Veritas skew rabbet plane. The first challenge was to find a way to hold the boards while planing the rabbets. Below you can see the clamp setup I used while planing the rabbets across the end-grain. These rabbets will allow the bottom boards to sit up inside the bottom rails a bit.
I then built a jig to hold the bottom pieces to plane the rabbets on the sides that will form the ship-lap joint. Cutting these joints by hand was a bit of work but after I got the hang of it it only took a few minutes per board. The fact that I could do it at 11:30 at night with the garage door open made it worth the workout.
The key here is to make sure you flip the board so that the rabbets are on opposite faces on either side. I messed up one board by cutting both rabbets on the same face. Luckily I had made a few extras just in case. Below you can see another view of the clamping jig I setup to hold the pieces while planing the rabbets. It will be nice to have an actual workbench someday but I've been surprised how well I've been able to get by by using my table saw top and a few jigs/clamps.
Below you can see a few test pieces I cut to dial in the dimensions of the ship-lap joint. I was pretty happy at this point that my first hand tool joinery was working out well.
Below is an example of one of the finished bottom pieces with the rabbets on both ends and on opposite faces along both edges.
Below is the fantastic pile of nice curly shavings that I made while cutting the rabbets. It's a mess but it sure beats sawdust.
Once I had all the rabbets cut I started cutting the end pieces to fit around the posts in the corners. Below you can see the test fit of the first few pieces.
The ship-laps fit together nicely and filled in the bottom. The cool part about using a ship-lap bottom is that it allowed me to use up a bunch of the shorter scraps that aren't much use for most other projects.
Below if the bench bottom with all the pieces fit and in place. Other than some finish the only step left to complete the bottom is to make the "brackets" that will screw to the lower rails underneath the bottom pieces to support them.
With the bottom basically done I shifted focus to the lid. I saved the nicer pieces of clear riftsawn oak for this. I ripped each piece to width and then ran it over the jointer. I then hit each edge with the hand plane to remove the fine milling marks to make the joint as fine as possible. Once all the pieces were ready for glue-up I arranged them so the grain was running in the same direction (arrows seen below) to make planing easier once glued-up. I then sorted them by color and then marked the arrangement with a triangle across the panel to make sure everything goes where it is supposed to during glue-up. Below you can see the panel glue-up in process.
Below you can see the panel once the glue had dried.
At this point I had to drop it on the bench just to see how it would look. So far so good.
The next step was to cut the lid to length. In the past I would have used a circular saw and a guide to make this cut. Setting that all up is a pain so I gave the hand saw a shot.
It actually worked out pretty well, it turns out a saw really wants to cut straight and as long as you can stay out of its way and let it do its job it's pretty easy to saw to a straight line.
The cut wasn't perfect though and I had to do something to remove the saw marks anyway so I clamped the lid up to my work table and hit the freshly cut end with the low angle jack plane.
Wow, was this cool...after sharpening up the blade this plane was taking see through shavings of end grain oak. The resulting surface was impressively smooth and almost dead straight across.

The next step was to flatten the top and bottom faces of the lid. Its tough to get the boards perfectly aligned when gluing up the panel so I had to take off a decent amount to even out the high and low spots. I did the rough leveling with the low angle jack fitted with a toothed blade. This setup let me take off quite a bit per pass without having to worry about tear-out. This is the part of the project that really sold me on hand tools. In the time it took me a to cook a frozen pizza I had the first face basically leveled. This would have take me all day with the a sander. After all the rough leveling was done I sharpened up the blade in the smooth plane at about 45 degrees and took a few shavings off to leave a near perfect surface (and again... no sanding). Below you can see what will be the inside/bottom of the lid with some mineral spirits on it to highlight any defects.

Below is a nice picture of one of the see through near full length shavings I was taking off on the top of the lid. Planing is sure as heck way more fun than sanding.
Below is a picture of the top surface of the lid with some mineral spirits on it to approximate what it will look like when finished. the color and grain match isn't perfect but I love the rift-sawn grain and am generally pretty happy with how it turned out.
Here is the obligatory test fit on the bench frame showing what the bench should look like when complete.
Here is another view with the lid sitting on the frame.
Next on the to-do list is to begin pre-finishing the bottom pieces and the lid, then make the brackets to hold the bottom in place, then add battens to the inside of the lid to help limit any warping, then fitting the hinges for the lid, and finally one final coat of finish on the bench frame.