After months of acquiring tools and getting everything setup it was finally time to start building the coffee table. The first step was to come up with a design that looked nice but was reasonable to build as a rookie woodworker. Searching around on the web I came across the plans linked
here which served as a good starting point. Laura thought it was acceptable and the craftsman style seemed simple enough to build so started drawing up the design in sketchup to see how it would look if I stretched out the proportions to roughly two feet by four feet.

Other than the dimension changes I also made a few other tweaks. First I tapered the two inside faces at the bottom of each leg to add a bit of detail. The other change was the spacing of the slats at each end of the table. In the base design the slats are spaced evenly from each other and centered from the legs. Laura suggested changing this up a bit so I drew up a few options and we ultimately settled on the spacing above.
Using the sketchup model as a guide a created a cut list of all the components I would need to build and started laying them out on the rough red oak with a piece of chalk.

Once I determined what components I wanted to get out of each board I cut them to rough length on the miter saw before jointing one face and one edge square and then sending them through the planer. I was a bit worried that I was going to run into issues with planer snipe (messing up the ends) but the planer handled the shorter sections perfectly.

I marked the jointed edges with chalk so I could make sure to use that edge as the reference when ripping the pieces to width later.

When processing the wider boards I started by cutting rough sections to length and then jointing one of the edges flat. That allowed me to then rip the wide boards in half and then break them down, joint, and plane them the same as the smaller boards.
Since I wanted the legs of the table to be roughly 1 and 3/4" square I decided to pickup some 2" thick stock rather than mess around gluing up multiple 1" pieces. so I grabbed this piece from H and K woods. Both ends had big cracks so they gave me a nice discount and since I was cutting out fairly small legs and could work around most of the cracks it was a pretty good deal.

I started breaking this down by using the circular saw to cut off a slab about 18" long that I hoped would work for all 4 legs.

Unfortunately there was more checking than expected so I needed to cut out another 18" slab to get all four legs.

Above you can see all the components planed and cut to size and stacked on the miter saw. I think I need a bigger work bench.

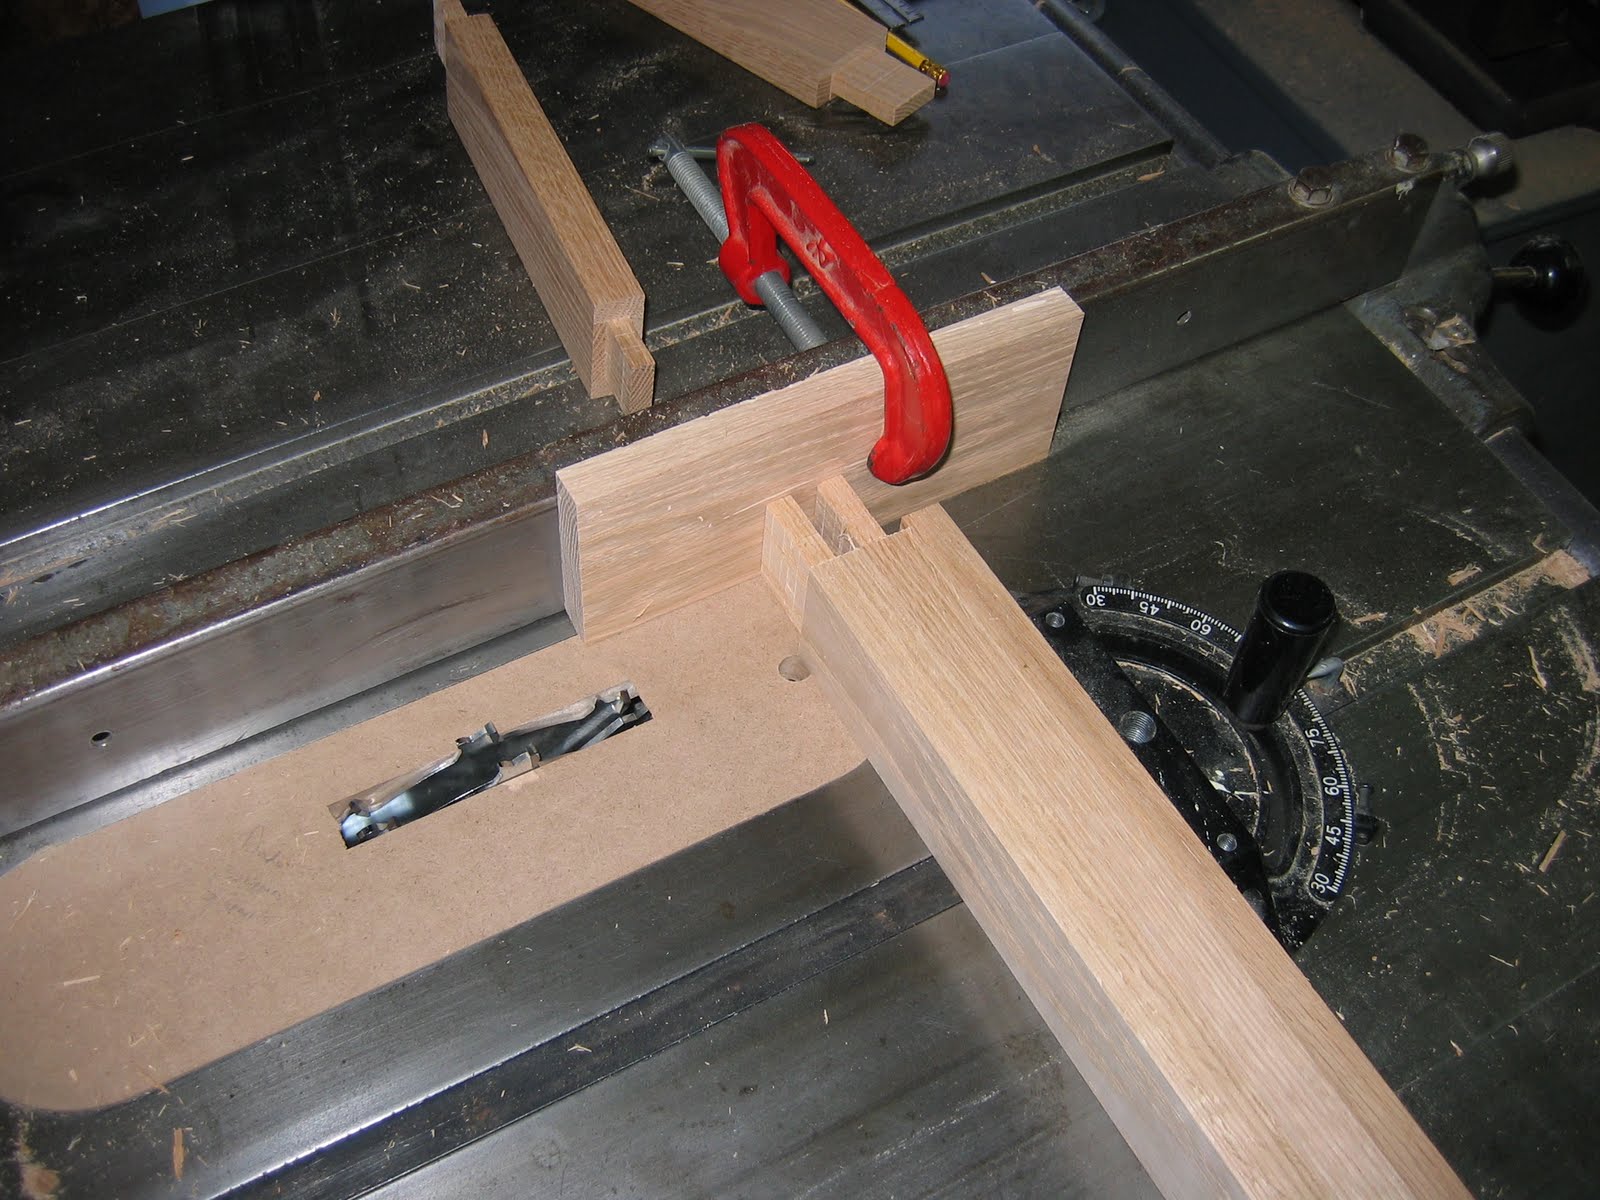
The next step was to cut some mortise and tenon test pieces to get things setup to do the joints on the actual table components. Above you can see a few 3/8" test mortises I drilled out to get the position and depth set right.

I used a test scrap to get the dado blade setup correctly for cutting the tenons. I started by cutting the cheeks down until I could slide a corner of the tenon into the mortise.

I then followed the same steps to slowly dial in the shoulder depth until the joint fit snuggly.

Next I laid out the locations of the mortises in the legs with a pencil to make sure I wasn't drilling holes in the wrong spots

I then used stop blocks clamped to the fence on the mortising machine to set the locations of each end of the mortises on the legs. This eliminated the need to layout guidelines and line things up when drilling and ensured that each one would be in the correct location.

Below are the legs with all the mortises cut.

Next I cut the tenons on all the frame pieces with the dado blade. I used the test tenon to setup the auxiliary fence and blade height and then ran the pieces through a few at a time.

Since the top of each leg has a mortise and tenon on two adjacent faces I needed to miter these tenons so that they would fit. when both joints were assembled.

Here is the basic frame standing on its own. As a new woodworker this was a pretty cool moment.

As you can see above the frame is still missing the decorative slats on each end so that's what I worked on next. I planed the stock down to a half inch thick and cut the pieces to size.

I then followed the same procedure for cutting the mortise and tenon joints but used a 5/16" mortiser bit since the rails are much thinner than the table legs.

Here is an end with all the slats test fit together.

Next I had to cut a few grooves in the frame pieces. On the upper rails I needed to cut a 1/4" groove for the button blocks that will attach the top. On the 2 lower end rails I needed to cut a 13/16" groove for the lower shelf to sit in once assembled.

The last thing to do on the frame was to taper the ends of the table legs. I found a bunch of plans online for nice adjustable tapering jigs but since it was 10PM and I didn't have the correct hinges or hardware I decided to slap together a simple jig just for these legs.

I started by laying out the taper on a test leg and using that along with the kerf in the zero clearance insert to set the angle of two pieces of oak scrap. I then screwed these scraps together with drywall screws and tried a few test cuts.

The test cuts worked pretty well so I went ahead and cut the tapers on the legs. Below you can see a final test fit of the end section with the tapered legs.

The last item related to the frame was to cut out button blocks that, in conjunction with the groove in the top rails, would secure the table top to the frame while allowing it to expand and contract with changes in humidity. I used a scrap that I had cut with the same groove as the top rails to setup the saw to cut out a rabbet from scrap that I planed down to the correct thickness. I then set the fence and cut them down to roughly 1" in length. Below you can see how the button blocks fit into the groove. The blocks are then screwed up into the table top as shown in the plans I linked earlier in the post.

Before I move onto gluing up the panels for the top and shelf I want to finish and assemble the majority of the table frame so that is next on the list. Stay tuned for finishing pictures.