December 23, 2012

Entryway Storage Bench Part 5

This week I finally finished the storage bench that has been in progress on and off for probably 2 years or more. I pre-finished the ship-lapped boards that made up the bottom of the storage area and got them mounted with a few cleats screwed into the inside of the bottom frame. The next step was to add a bevel to the lid which not only adds some visual interest but also removed the dents and gouges around the edge that I inadvertently added while trying to clamp the panel to the face of the work table to plane the edges and end grain. I keep hearing that the key to successful woodworking is finding creative ways to hide your screw-ups. This was one of those challenges. I don't have any router bits for anything like this and cutting this bevel on the table saw seemed risky so I settled on planing the bevel by hand. I marked the start and stop of the bevel on both the top surface and the edge of the lid and then started planing free hand. I used a low angle jack for the ends and the bevel up smoother sharpened to a high angle to deal with some reversing grain on the sides. Overall it was pretty straightforward once I got started and I think it worked out nicely. The bevels are not perfect but they were done by hand and I'm happy with the results.


With the bevel complete I moved on to finishing the lid. I added some cross grain batons to help limit any cupping and then wiped on 4 or 5 coats of polyurethane. As soon as the finish dried I dropped the lid onto the bench to see how it looked.


I ordered some torsion hinges from Rockler to mount the lid. These hinges are similar to those on a laptop. The lid basically stays where you put it so that there are no worries about fingers getting slammed between the lid and the frame.


The hinges were easy to mount and work as advertised.... and now the bench is finally done.


Lessons learned from this project:
1) Even a seemingly simple project takes forever if you don't have time to spend in the shop. I need to make time to work on these projects more consistently.
2) I really enjoy working wood with hand tools and I need to build a real workbench with dog holes and a decent face vise.
3) Carefully selecting wood with appropriate grain patterns for each component of a project makes a huge difference in the finished product.
4) I strongly prefer the straight grained look of quarter and rift-sawn oak compared to the wild patterns of plain-sawn oak.

June 5, 2012

Entryway Storage Bench Part 4


The next step in the entry bench project was to make all of the pieces that would create the ship-lap bottom. After planing all the pieces down to the proper thickness, jointing an edge, ripping them to width, and cross cutting them to length I got a chance to try out my new Veritas skew rabbet plane. The first challenge was to find a way to hold the boards while planing the rabbets. Below you can see the clamp setup I used while planing the rabbets across the end-grain. These rabbets will allow the bottom boards to sit up inside the bottom rails a bit.


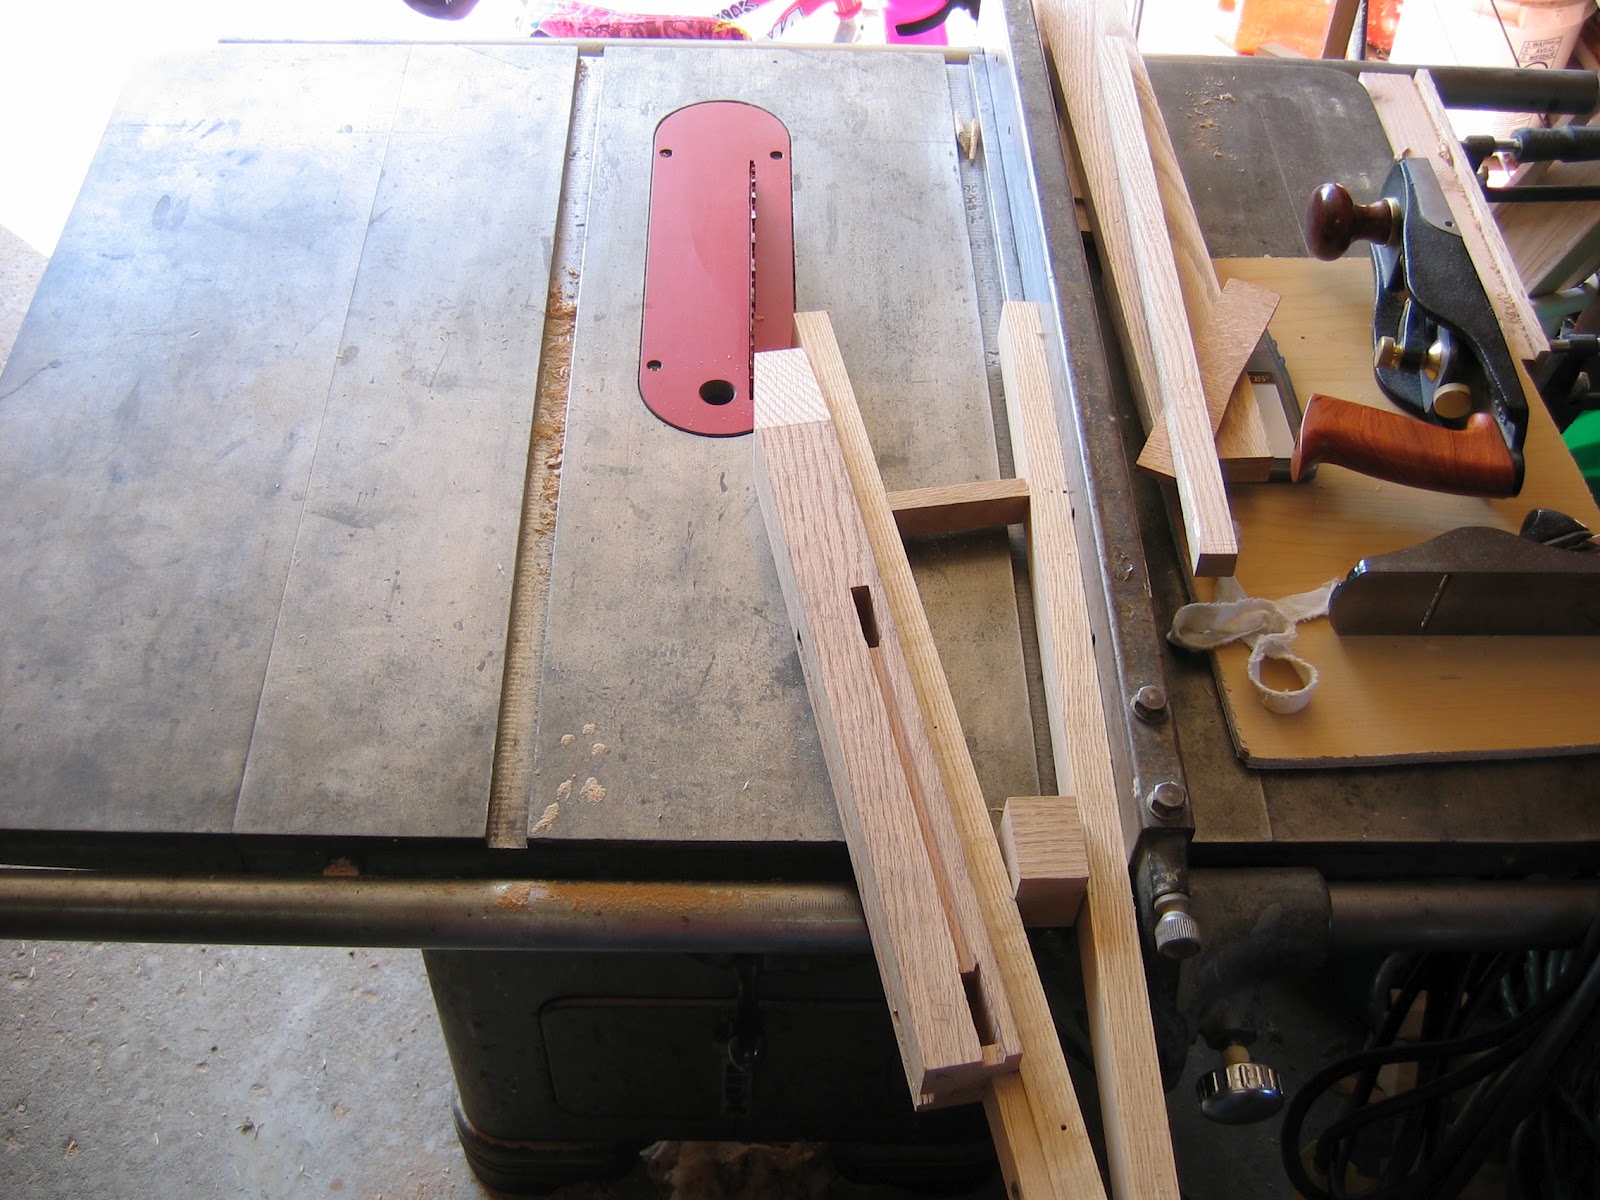
I then built a jig to hold the bottom pieces to plane the rabbets on the sides that will form the ship-lap joint. Cutting these joints by hand was a bit of work but after I got the hang of it it only took a few minutes per board. The fact that I could do it at 11:30 at night with the garage door open made it worth the workout.


The key here is to make sure you flip the board so that the rabbets are on opposite faces on either side. I messed up one board by cutting both rabbets on the same face. Luckily I had made a few extras just in case. Below you can see another view of the clamping jig I setup to hold the pieces while planing the rabbets. It will be nice to have an actual workbench someday but I've been surprised how well I've been able to get by by using my table saw top and a few jigs/clamps.


Below you can see a few test pieces I cut to dial in the dimensions of the ship-lap joint. I was pretty happy at this point that my first hand tool joinery was working out well.


Below is an example of one of the finished bottom pieces with the rabbets on both ends and on opposite faces along both edges.


Below is the fantastic pile of nice curly shavings that I made while cutting the rabbets. It's a mess but it sure beats sawdust.


Once I had all the rabbets cut I started cutting the end pieces to fit around the posts in the corners. Below you can see the test fit of the first few pieces.


The ship-laps fit together nicely and filled in the bottom. The cool part about using a ship-lap bottom is that it allowed me to use up a bunch of the shorter scraps that aren't much use for most other projects.


Below if the bench bottom with all the pieces fit and in place. Other than some finish the only step left to complete the bottom is to make the "brackets" that will screw to the lower rails underneath the bottom pieces to support them.


With the bottom basically done I shifted focus to the lid. I saved the nicer pieces of clear riftsawn oak for this. I ripped each piece to width and then ran it over the jointer. I then hit each edge with the hand plane to remove the fine milling marks to make the joint as fine as possible. Once all the pieces were ready for glue-up I arranged them so the grain was running in the same direction (arrows seen below) to make planing easier once glued-up. I then sorted them by color and then marked the arrangement with a triangle across the panel to make sure everything goes where it is supposed to during glue-up. Below you can see the panel glue-up in process.


Below you can see the panel once the glue had dried.


At this point I had to drop it on the bench just to see how it would look. So far so good.


The next step was to cut the lid to length. In the past I would have used a circular saw and a guide to make this cut. Setting that all up is a pain so I gave the hand saw a shot.


It actually worked out pretty well, it turns out a saw really wants to cut straight and as long as you can stay out of its way and let it do its job it's pretty easy to saw to a straight line.


The cut wasn't perfect though and I had to do something to remove the saw marks anyway so I clamped the lid up to my work table and hit the freshly cut end with the low angle jack plane.


Wow, was this cool...after sharpening up the blade this plane was taking see through shavings of end grain oak. The resulting surface was impressively smooth and almost dead straight across.


The next step was to flatten the top and bottom faces of the lid. Its tough to get the boards perfectly aligned when gluing up the panel so I had to take off a decent amount to even out the high and low spots. I did the rough leveling with the low angle jack fitted with a toothed blade. This setup let me take off quite a bit per pass without having to worry about tear-out. This is the part of the project that really sold me on hand tools. In the time it took me a to cook a frozen pizza I had the first face basically leveled. This would have take me all day with the a sander. After all the rough leveling was done I sharpened up the blade in the smooth plane at about 45 degrees and took a few shavings off to leave a near perfect surface (and again... no sanding). Below you can see what will be the inside/bottom of the lid with some mineral spirits on it to highlight any defects.


Below is a nice picture of one of the see through near full length shavings I was taking off on the top of the lid. Planing is sure as heck way more fun than sanding.


Below is a picture of the top surface of the lid with some mineral spirits on it to approximate what it will look like when finished. the color and grain match isn't perfect but I love the rift-sawn grain and am generally pretty happy with how it turned out.


Here is the obligatory test fit on the bench frame showing what the bench should look like when complete.


Here is another view with the lid sitting on the frame.


Next on the to-do list is to begin pre-finishing the bottom pieces and the lid, then make the brackets to hold the bottom in place, then add battens to the inside of the lid to help limit any warping, then fitting the hinges for the lid, and finally one final coat of finish on the bench frame. 

May 15, 2012

Entryway Storage Bench Part 3

After dry-fitting the bench frame the next step was to break it back down and bevel the inside faces of the lower legs to match the coffee table I built a few years ago. I re-used the simple jig that I made last time as shown below. 


After cutting all of the bevels I used the smoothing plane to clean up the sawn surfaces.


Next I mounted the dado stack in the table saw to cut a rabbet on the bottom edge of each lower rail to house the ship lapped boards that will make up the bottom for the storage area.


I also pre-finished the panels with 4 or 5 coats of wipe-on poly. I'm pretty happy with the natural color and texture of the finish.


The next step was to smooth plane all surfaces of each component to prep them for finish. Since I pre-finished the panels I decided to finish the rest of the components prior to glue-up. In order to keep finish off of the glue surfaces I taped off the tenons and wedged pieces of foam caulk backer rod into the mortises.


All the parts were pre-finished with 3 coats of wipe-on poly and then lightly sanded prior to glue-up. I plan to apply one final coat of finish once everything is assembled.


Above you can see the end assemblies after being finished and glued up. I'm a big fan of the overall look of all this straight grained rift and quartersawn oak.


After smooth planing and pre-finishing the long rails I glued up the full bench frame.


So far I'm pretty excited with how this is turning out. Next on the to-do list is to glue up the seat/lid and then plane it smooth as well as cutting all of the boards to make the ship lap bottom.

April 11, 2012

Entryway Storage Bench Part 2

Recently I've been working on surfacing the book-matched panels that will make up the front and back of the bench "box". Due to similar issues with reversing grain and tearout I've been following the same procedure as with the smaller end panels: Glue-up the book-matched panel, rough thickness on the power planer, and then remove the tearout and smooth the surfaces with a smoothing plane. 

The picture below shows one of the panels after rough thicknessing on the power planer. There is quite a bit of tearout and one corner of the panel was thinner than the rest and still shows the rough sawn surface. 


Since some of the tearout was pretty deep I switched to a toothed blade in the smoothing plane which allows a much more aggressive cut without any issues with tearout. This was my first time using a toothed blade and I was completely impressed with how much it sped up the process.


Below is a picture midway through the process showing the texture that the toothed blade leaves. You can also see that I've planed down past much of the tearout and am getting close to the level of the thin corner.


The picture below shows the panel approaching final thickness with just a bit of the corner still just a bit thinner than the rest.


Below the panel is to final thickness and I've take a few swipes with the regular blade in the smoothing plane to take off some of the texture.


After fully smoothing the panels I trimmed them to size to fit into the frame. I trimmed them to width and then used a block plane to bevel the inside edges until they fit snugly into the grooves.I then dropped the panel into the frame and marked the exposed end to the final length. Below you can see the front panel fit and the back panel being marked for length.


And here is the full frame and all 4 panels test fit together.


The next step is to break it down and prefinish the panels while I finish up the frame by putting the bevels on the inside corners of the legs and adding a groove or rabbet to the lower rails to hold the boards that will make up the bottom of the storage area.

March 25, 2012

Entryway Storage Bench

I've been working on a storage bench for the entryway on and off (mostly off) for over a year now and have finally made some progress and pulled some pictures off the camera to post an update. The goal of this project is to build a bench that will fit in the entryway and provide a place to sit to put shoes on, some storage under the seat for the winter gear that always gets dropped by the front door, and some room underneath for a couple pairs of shoes. I sketched-up the design below to fit the space available and generally match the craftsmen/mission style of the coffee table I built.


I'm using some of the oak from the massive 2x12's that I found on craigslist awhile back. When I bought it the guy said it was white oak but now that I've been working with it a bit it is clearly red oak. I wasn't overly thrilled with the wild grain patterns in the plain-sawn oak I used for the coffee table so I decided to try to use only rift-sawn or quarter-sawn pieces with simpler straight grain for this project. Luckily many of the 2x12's were from the center of the tree and the outer edges are mostly rift-sawn or better.


 In order to break the 2x12's down into manageable pieces I started by ripping them in half lengthwise with a circular saw (you can see from the poor picture quality that I started this about a year ago before I got my camera fixed).


I then cut the resulting 2x6 pieces into reasonable lengths to make them easier to handle.


Those pieces were then face and edge jointed to get one flat face and one 90 degree flat edge to provide a decent reference for resawing in half. The picture below was one of my first attempts at resawing based on a pencil line down the middle of the board. This worked but took a lot of concentration so I ultimately built a resaw fence from some scraps so that I could setup the fence to the right thickness and then just run the boards through.


After I got a bunch of raw stock resawed down to standard 1" thick boards I started sorting through them to pick out the boards with the straightest grain for the seat/top of the bench. After I had the boards for the seat/top picked out I milled them square and flat and started edge jointing them to prep them for glue-up. At this point, which was sometime last summer, I noticed that my jointer was out of alignment and was actually making convex edges rather than straight. Fast forward 6 months or so and I now have the jointer dialed in again and the boards for the seat/top are ready to be glued up. A few weeks ago I really started making progress again and I got the frame pieces milled to size and all the mortise and tenon joinery done. 


Next I started working on the panels that will be held inside the groove in the frame members. For the panels  I attempted to find true quarter-sawn boards with decent ray fleck which should look nice when resawn and book-matched back together to make a roughly 1/4" thick panel with a mirror image grain pattern. Below you can see one of the boards after resawing and edge jointing by hand with a #5 hand plane.


For a relatively short joint like this it was fairly easy to get a decent butt joint between the two edges with the #5. Below you can see the rough panel in the clamps with a nice bead of glue squeeze out.


Below you can see the front panel and both end panels after going through the thickness planer to bring them down closer to the target 1/4" thickness. The grain on these pieces was kinda squirrely and being red oak the tearout was pretty bad. I am now convinced that red oak has to be more prone to tearout than most other woods. I'm looking forward to working with some cherry or maple in the future just to see if you can plane it without leaving craters all over the board.


Below you can see the tearout along with the fantastic book matched ray fleck figure.


Since I have no chance at getting these panels smooth with the thickness planer I decided to take another leap into woodworking with hand tools and give it a shot with a Veritas bevel-up smoothing plane. I sharpened the blade with a 45 degree bevel which results in a 57 degree cutting angle with the 12 degree bed angle figured in. The steep cutting angle is a real pain to push through the wood but as long as the blade is sharp it basically eliminates any chance of tearout and leaves a really smooth surface.


In the picture above I added some mineral spirits to the panel to highlight the grain and make sure the surface was smooth and free of any tearout.


At this point I am convinced that hand tools have a place in a modern wood shop. It was a blast peeling off beautiful see through curls of wood and the surface it left was gorgeous. The workout that comes with it is an added bonus.


The need for a decent workbench is becoming apparent but above you can see how I've been making due using the top of my Unisaw with a stick wedged into the miter slot as a planing stop.


Here is another pic of one of the panels after smooth planing and some mineral spirits to show the figure.


With the two end panels smoothed I couldn't resist the urge to trim them to size and test fit them into the end frames.


With the frame apart to fit the panels I grabbed a picture showing more detail on the joinery. The grooves that hold the panels were cut with the dado stack through the top of the leg and then stopped at the bottom mortise. The grooves out the top of the leg were widened to the thickness of the mortises and a haunch was cut into the tenons to fill the widened grooves. This not only fills the grooves but also adds some extra strength to the mortise and tenon joints.


At this point my next step is to smooth the larger front panel. Here you can see a planing stop I rigged up at the left end of the table saw so that I can use the whole table top surface. Based on how much effort it took to smooth the two smaller panels this is going to be quite a workout. Luckily, it is nice and quiet so I can work on it a bit each night without having to worry about bothering the tenant or neighbors with loud power tools...another bonus for hand tools.