It has been almost two years since my last update on the bed project and even longer since I started the project in September of 2014... what in the world is taking so long?
Well I did make some progress last winter but didn't get around to posting an update. I smoothed the faces of the bed rails and squared off the ends on the shooting board.
I then ripped the long pieces that will be added to the inside of the rails to form a ledge for the cross boards to rest on.
To simplify the glue-up process I drilled and chamfered holes to screw the pieces to the side rails.
Next drilled the drawbore holes in the corner posts and the matching offset holes in the headboard and footboard. Due to the width of the pieces I made sure to elongate the outer holes to allow for seasonal expansion and contraction. I then had some fun experimenting with different smoothing techniques on the footboard. The cabinet scraper worked well but I also setup my Veritas block plane as a "mini-smoother" with the knob and tote kit and a high pitched blade which was more effective on this large piece that was far from totally flat.
At this point I was ready to assemble the footboard but when I checked on the drawbore pegs they had picked up too much moisture and no longer fit into the pre-drilled holes so I threw them into the food dehydrator (aka mini-kiln) overnight to shrink them down a bit.
The next day the pegs fit once again so I proceeded to assembly the footboard with liquid hide glue only on the center tenon to allow the outer tenons to float as needed with the seasonal changes in humidity. In theory the clamps weren't needed but after I experienced a bad blow out drawboring my workbench legs I felt the extra insurance was warranted. In the end the pegs pulled the assembly nice and tight just as they should.
After drying out the drawbore pegs there were actually slightly undersized within the holes and there were some slight gaps so I dabbed some water onto the end grain in an attempt to get them to swell up a bit to close the gaps. I also wiped off a bit of excess glue on the footboard before it set.
At this point (March 2016) all progress on the bed stopped as I shifted focus towards our search for a new home and finishing off a basement remodel. We ended up finding a new home (with a detached 26'x30' garage) and moving in May of 2016. Since the move all of my free time has been spent converting the extra garage into a real workshop.
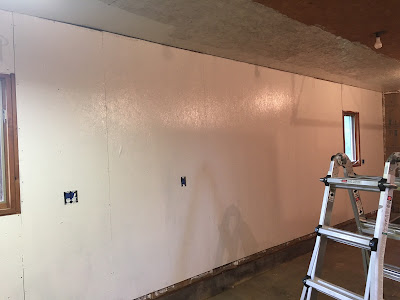
The first priority was to get one wall re-wired, insulated, covered with OSB, and painted so that I could setup my lumber rack.
Getting the lumber off the floor freed up enough space in the shop to allow me to work on the rest of the wiring, insulation, and OSB.
As I was getting most of those items wrapped up in the fall the priority quickly shifted to getting heat setup for winter. After an extensive analysis of options (mini-split, LP tank, gas line from the house, etc...) I made the call to WE Energies to install a new line with a separate meter.
I then ordered a 75kBTU Beacon Morris unit heater and a separate combustion/concentric vent kit. Unfortunately by the time the vent kit arrived our mild fall was gone and I had to work through bitter cold (-30F wind chills) while cutting the hole for the vent and the rest of the heater installation.
Now that the heater is up and running I am forcing myself to get the walls and ceiling painted before I start setting up the rest of my tools.
One other curve ball is that my wife surprised me with a G0766 lathe as a birthday/Christmas gift this year so I may end up taking a slight detour to turn some sort of token of thanks for my wife before jumping back in to finish off the bed project.


No comments:
Post a Comment